
Skiing Up and Down Mount Shasta
7,000 ft of elevation gain and then the longest ski run of my life in 24 hours

Our mission on Mt Shasta: 7,000 ft of elevation gain and then the longest ski run of my life in 24 hours. At 14,179 ft, the snowy peak is by far the tallest and whitest point in the area, visible for over an hour before you arrive to a trailhead.
The first stop of our trip was the Fifth Season, where my partner rented an ice axe and boot crampons, which were heavy but good quality. As we stood in line, a honk from outside prompted eye-rolls and murmors of “city folks…do they drive like this back home?” by the staff. Beyond rentals and amusement, the store also offers a climbing and ski hotline (530-926-5555, more info here) with up-to-date conditions.
Our second Shasta stop, Seven Suns Coffee and Cafe, wasn’t as great. Our lunch was edible but lacked flavor. We had purchased burritos for dinner at camp, but these ended up being so bad, despite our hunger, we ate less than half. Needless to say, we wouldn’t recommend.

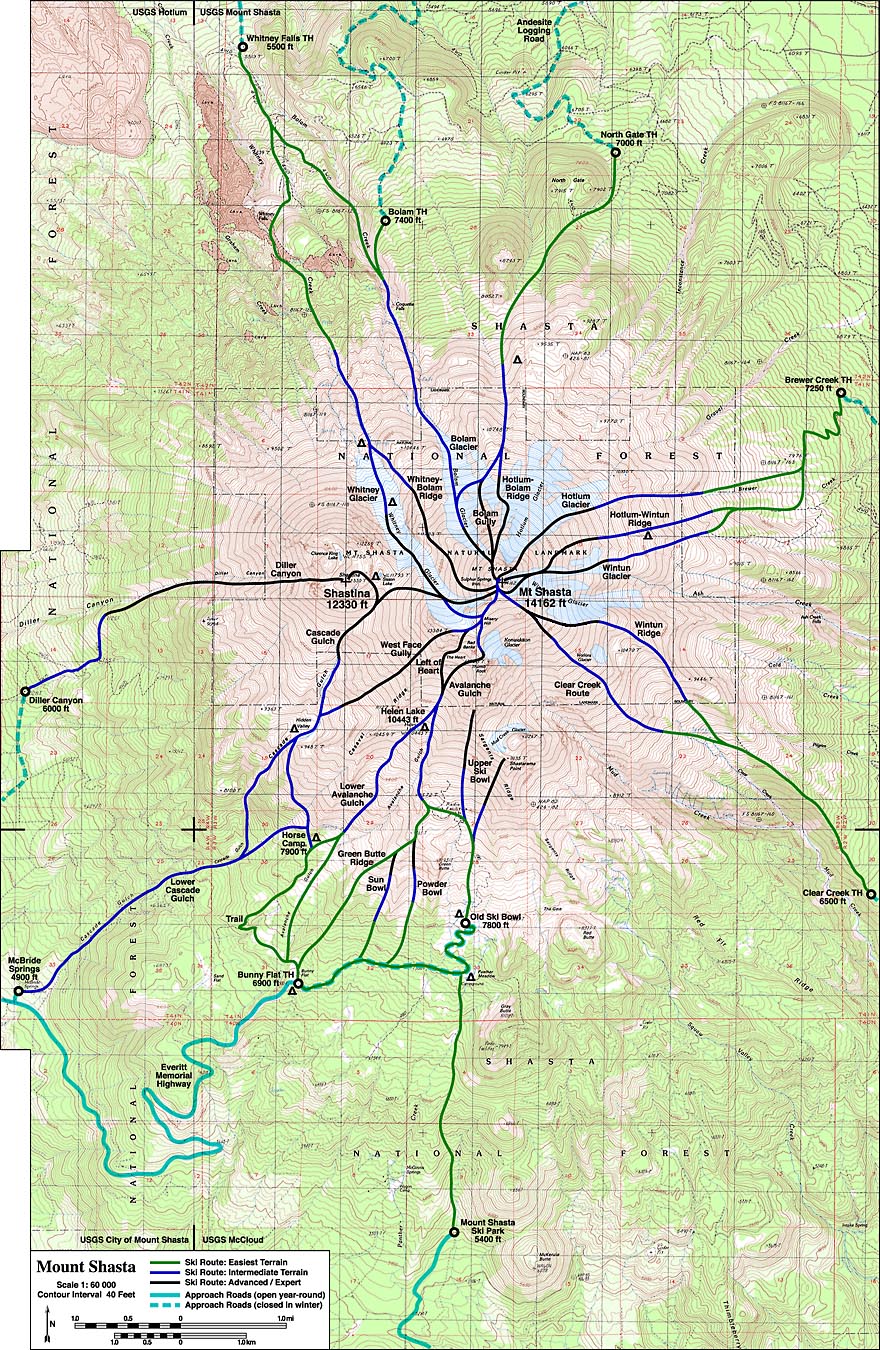
Next, we headed to Bunny Flat trailhead. Once we parked and got permits sorted (it’s 25 bucks in cash per person), we began the trek at 1:30pm.

Despite the sweltering 90+ degree heat, we enjoyed the snow-covered trail through a mellow valley bordered by picturesque trees. Later, the route became more demanding, but ski crampons helped.
The trail was full of skiers, hikers, and glissaders (see picture below), the latter carving out paths that proved challenging for skiers to skin (i.e. uphill backcountry ski) across.

The day culminates with the steepest hill of the day. While I could walk straight up because of my ski crampons, my partner made switchbacks that skiers behind followed.

At 6pm, we pitched our tent at Helen Lake, digging out a snow spot near a man-made rock barrier. Rangers at Helen Lake gave a primer on conditions but we were too late to hear it and another skier kindly informed us what the ranger mentioned.
As my partner watched the sun set over the mountains, I curled up with my book on his sleeping pad and we both tried to forget about the burritos.

The following morning, after a restful night for me (and a somewhat windier, sleepless one for my partner), we commenced our ascent, skis on our backs and crampons on our boots, at 5:15 a.m. We began with a manageable slope, but soon we were weaving switchbacks up a steep section (+30 degrees) littered with avalanche debris. Above us, we saw lines of climbers and one group of 6 roped up (so that if one person fell they wouldn’t go far down).

Around an hour and half in, we heard shouts of “Rock!” from above — a warning that dislodged rocks were hurtling down towards us. We danced around these incoming missiles, while simultaneously alerting those below us. Luckily, nothing happened to us but unfortunately one of the group of 6, less agile due to being tied together, wasn’t able to dodge a rock and ended up needing to get helicoptered out.

After the adrenaline-fueled episode, we decided to traverse to a more protected area to complete our climb to the Thumb (see below picture in “Trip Planning”). We felt secure thanks to the well-trodden trail, an unexpected bonus of having approximately 200 other people climbing Mt. Shasta on the same day.
Upon reaching the ridge line, the sunrise lent a cozy warmth to the chilling air. At the Thumb, we were feeling pretty good till we crossed paths with a runner who had reached our point in 2.5 hours from the parking lot. The runner was apparently going slow today for a friend who was doing his first training run up Shasta.
We pressed on and finally reached Misery Hill. We offloaded our gear, keeping just one pack between us with essentials: snacks, a summit layer, crampons, and water. Misery Hill is named due to how miserably windy and steep the climb is but because of the lack of snow and weight on our breaks, it was a huge break.
After going on a flat trail, there is a couple hundred feet of steep but not scary climbing to get to the top of Shasta.

We summited at 10:15am. At the summit ridge, there is a line of people to sign the summit registry as well as to take a photo on the true summit (each person gets their photo taken by the previous person who got their photo taken).

Although a summit is always exciting, we were more excited to ski down! We quickly made our way back to our skis, but realized that we were uncertain of the best route down and our visibility was obstructed by the mountain’s ridge line. Fortuitously, we found ourselves amidst seasoned skiers who kindly shared how to get down.
As we descended, we noticed the snow was great at the top, but our fatigue from the previous climb turned our legs to jelly.
Once we got further down, the snow started to be more grabby and heavy. We’d get a bucket amount of snow on our skis and it would stick and weigh us down as if there was a human standing on top of our skis.
The final few miles were a delightful meander through a tree-lined path that resembled a fun ski luge. It was a gently sloping trail with playful bumps — a truly enjoyable way to conclude our skiing adventure.
We got back to the car in the early afternoon and thought the hardest part was over, but little did we know it was going to be over 100 degrees for the next 4 hours in the car and we wouldn’t have AC. :)
Trip Planning

Below, I've provided some useful trip planning resources.
Resources:
http://www.skimountaineer.com/CascadeSki/Shasta/ShastaSkiRoutesMap.jpg
http://www.skimountaineer.com/CascadeSki/CascadeSki.php?name=Shasta
Before you leave:
Call the ranger station to get trail conditions and check out the weather and general conditions.
Decide route and if you want to camp overnight. The original route we wanted to do’s trailhead wasn’t open which made us decide on the classic Avalanche Gulch route. We decided to do it over two nights since neither of us had done 7,000 ft in vert in one day and wanted to make sure we didn’t get hurt and had a fun time.
Download the route - this was the GPX we used. We didn’t use it at all but I was glad we had it. Next time, I would have liked to download a gpx with the best descent ski lines.
Pack all of your water - we ended up bringing all the water we needed for the 24 hours we were on the mountain and had a stove as backup. I highly recommend this since it’s hard to find a clean water source at camp with so many humans and, if you get in late, it’s not really something you want to spend time doing anyways.
Questions to know the answers to:
Does the route involve any glaciers?
Is being roped up recommended and if so, why?
What is the water situation?
Where is it recommended to camp?
How long does it normally take folks from X to Y? Specifically we asked about going to Lake Helen from Bunny Flat and getting to the top of Shasta from Lake Helen.
Can we skin from the parking lot? Do we need ski crampons at any point? When should we transition to boot crampons? At what point, is it recommended to ski down from?
What time should we be skiing down? Do we need skins for going down at any point?
What are the different routes we can take down?
What is the likelihood of wind, snow, rain or rock fall?
What is the weather each day?
Packing
4 liters of water
Sleeping pad
Sleeping bag
Pillow
Tent
Hat for sun
Beacon, probe, shovel
skins, skis, boots, poles
Ski crampons
Ice axe
Boot crampons
Clothing: socks 2x, sun hoodie, jacket layers, beanie, light and warm gloves, light neck band
Sunscreen, sunlips, sunglasses
Download GPX
Headlamp
Chord headphones, phone, extra battery
Watch
Helmet (I brought my ski helmet but wished I had brought my climbing helmet)
Jetboil + gas + lighter
snacks (2 pro bar meals, 4 regular bars, 8 gummy bags, dried fruit, nuts)
Electrolytes
Burritos
Trash bag ziplock for trash
TP kit for peeing
Poop bag (you are required to pack out your poop)
First aid kit
Leave in car: keys, credit card, cash , driver's license, change of clothing, extra water, food
This is SO EPIC!
Incredible experience and nice write up. It made my hair stand!